GARDEN PLOTS: Options for overwintering tender perennials in a greenhouse or sunroom (copy)
Published 6:00 am Wednesday, November 1, 2023
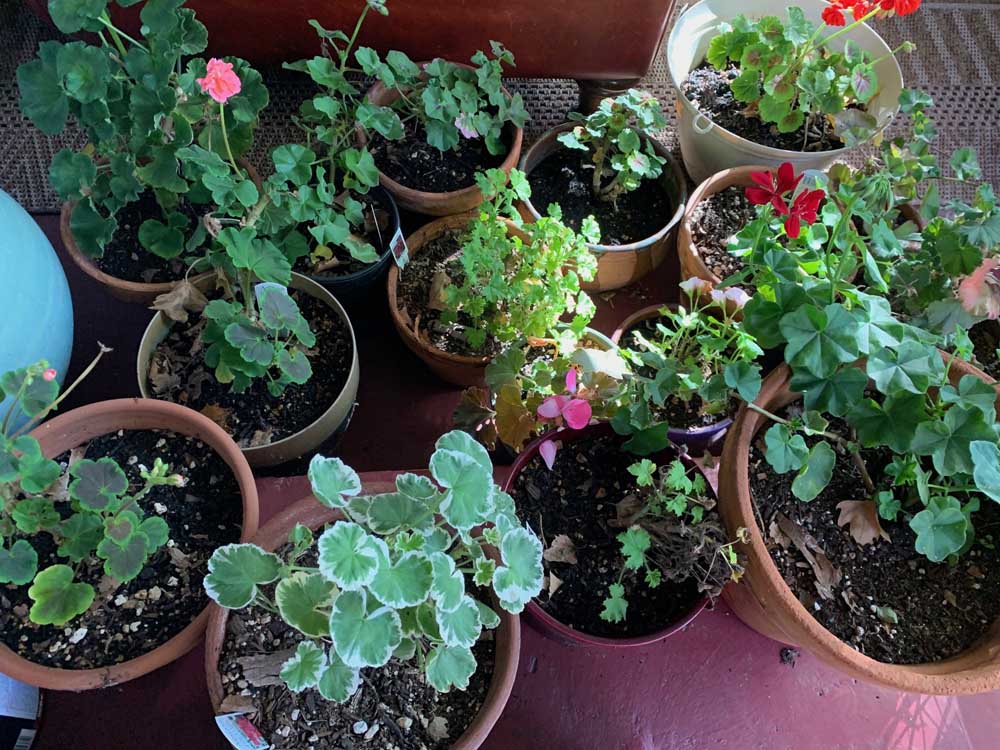
- The author’s pelargoniums will overwinter in pots near a sunny window. Some gardeners prune back their pelargoniums to give the plants a rest during wintertime.
“The completed renovation of the house, of course, was more costly than expected. We knew it was prudent to tighten our purse strings, and having a greenhouse was a luxury.”
Trending
— Page Dickey, “Uprooted: A Gardener Reflects on Beginning Again” 2020
At the beginning of Page Dickey’s most recent book, “Uprooted,” she tells us that one of the primary objectives of moving from New York to Connecticut in her 70s was to downsize and simplify her life and her garden. But after the first year without a greenhouse, she and her husband, Bosco, decided to build a 10-foot-by-16-foot glasshouse connected to the back of their garage.
After six months of excavation and construction, they were finally able to divert their time and money to the fun stuff — filling their new heated greenhouse with a variety of frost-tender plants: citruses, jasmines, violets, cyrtanthus (a South African bulb related to Amaryllis), ferns, succulents, and scented and zonal geraniums.
Trending
I have two types of greenhouses: in Medford, there is a 12-foot-by-20-foot peaked-roof greenhouse covered in polyurethane that I use to propagate seeds and starts during late winter and early spring, and at the coast, I have a 12-foot-by-40-foot hoophouse where I grow vegetables and herbs in raised beds during the spring and summer.
I’ve found that one of the challenges of having a greenhouse that is not used during the summer is that it can easily turn into a storage shed, like mine does in Medford, and then it’s hard to claim it back for gardening.
During the fall, I spend a lot of time in my sunroom, an 8-foot-by-20-foot room right off my living room that is enclosed on three sides by energy-efficient windows. Lately, I’ve been filling up the sunroom with frost-tender potted plants that have been outside since May.
In a previous column, I wrote about my tender perennial fuchsia, “Claudia,” who I’ve now brought inside to force into dormancy. I learned that having this winter respite will help reinvigorate Claudia to bloom prolifically next year (flowers will bloom on new wood). After snipping off about 2/3 of the length of her branches, I removed most of the leaves and set her in a corner for some beauty rest. Claudia will only need watering once a month until next spring.
In addition, I’ve brought inside my pelargoniums, which are also tender perennials even though they are often grown as annuals in Oregon. Dickey and her husband grow scented and zonal pelargoniums year-round in their glasshouse, but I grow mine in pots on a display stand outside and then bring them into the sunroom before the first hard frost.
There are a few options for overwintering pelargoniums. If they are grown in pots, like mine, then they can simply be set in a sunny spot that’s between 55-65 degrees Fahrenheit to continue growing. It’s a good time to check for soil-dwelling insects and to transfer plants into larger pots with fresh potting soil. Pelargoniums that are continuing to grow indoors will need to be watered so the soil stays slightly damp (not dry and not wet).
Another option is to give my pelargoniums the same winter break I’m giving my fuchsia, with the idea that a dormant period will give them an energy boost come spring. In that case, I’ll cut back the entire plant by one-third or one-half and water just enough so the plant doesn’t dry out.
The third option for overwintering pelargoniums involves taking cuttings to propagate new plants. This method can be used in tandem with giving them a hard pruning or in place of overwintering this year’s plants. To take cuttings, use a clean knife or razor blade to cut a green stem just below a leaf node. Remove flowers and buds, and remove leaves except for two healthy leaves that should be left at the top of the stem.
Dip the cut stem into an organic rooting hormone powder (or make your own with honey, cinnamon, or aloe vera), and then plant the stem in a pot with fresh potting mix (stems can be planted individually in a pot, or multiple stems can be planted in one pot). Plant the stem deep enough so it stands up on its own in the soil but don’t allow the stem to make contact with the bottom of the pot.
Water and cover the pot with plastic until the stem takes root in six to eight weeks. Keep the soil slightly damp, and uncover the pot if condensation forms on the plastic or if mold or fungus appear on the soil.
Marketplace


2025 Community Choice Awards

-
eEdition

-

-
